Watch out!
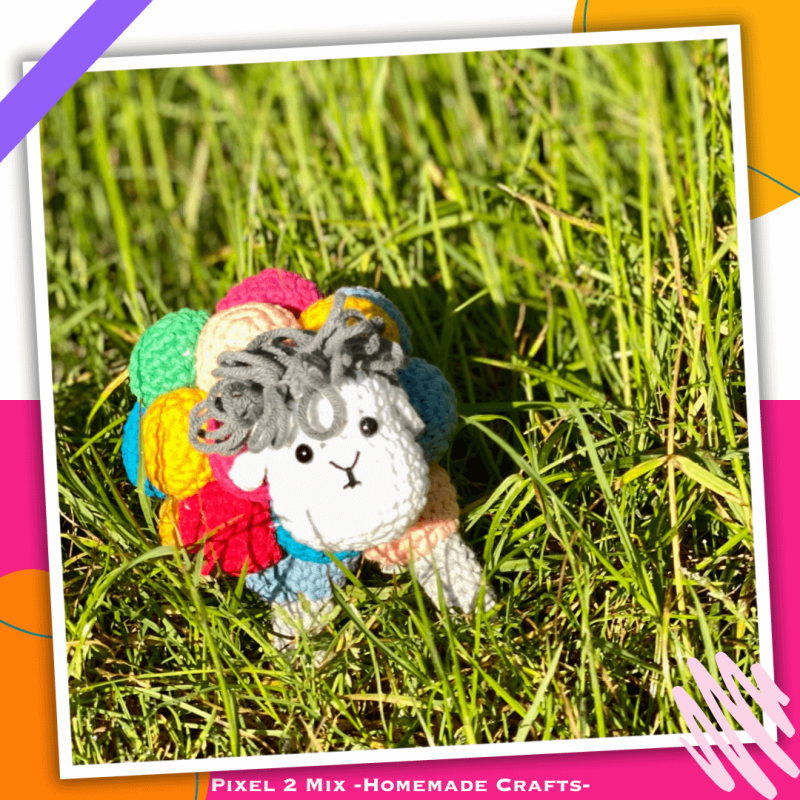
The Fluffy Woolly Gang: Sarah, Sophie, and Sandy! 🐑🌟
1 Pattern - 3 Different Types of Durable Yarns - 4 Woolly Sheep on an Adventure
With one crochet pattern for Sophie and three different types of Durable yarns, you can create four unique own woolly sheep. Get inspired by Sophie, see which leftover yarns of the same thickness you have, and start crocheting your sheep to share the joy of crafting with everyone!
The crochet pattern provided here is made with Durable Cosy Fine with Crochet Hook 4.0, USA 6.0 or UK 8.0.
Sarah

Durable Cosy
Crochet Hook 5.0
Sophie 1

Durable Cosy Fine
Crochet Hook 4.0
Sophie 2

Durable Cosy Fine
Crochet Hook 4.0
Sandy

Durable Coral
Crochet Hook 2.5
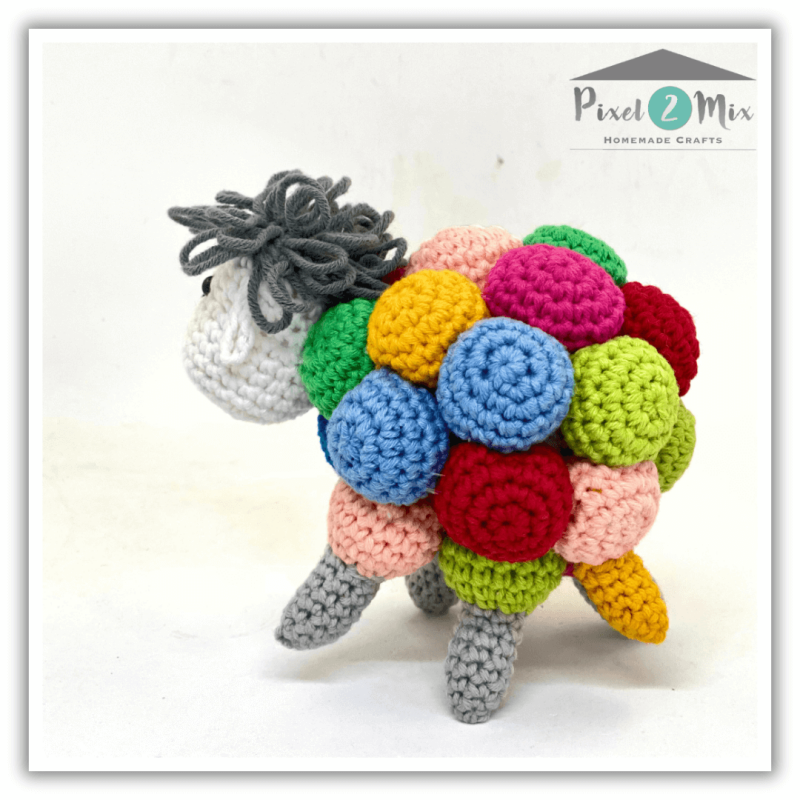
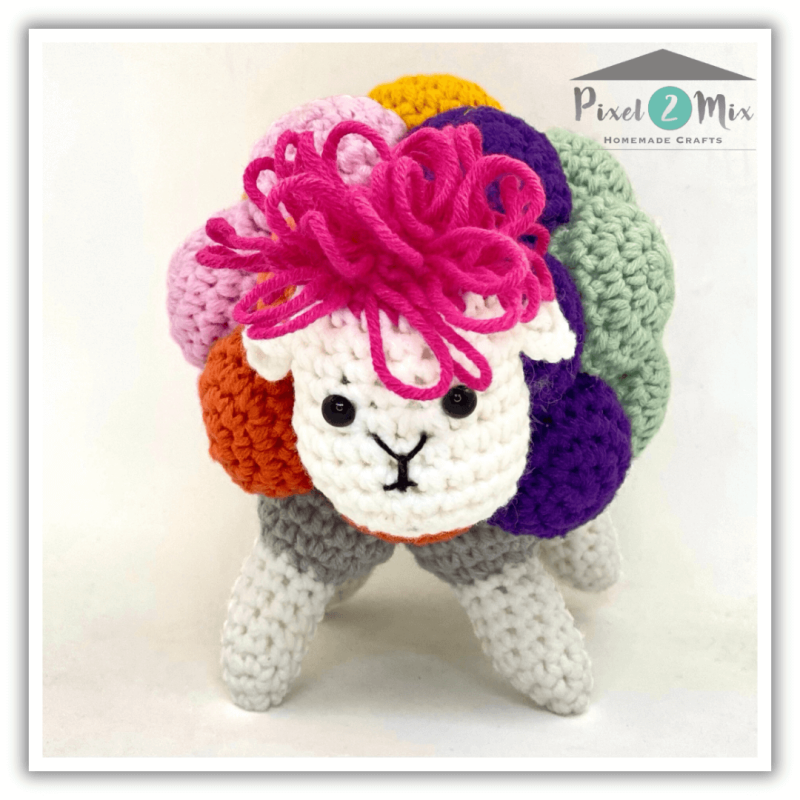
Sophie - The Chubby / Woolly Sheep
In a quiet village surrounded by green hills, there lived a sheep named Sophie. She was not just any sheep; Sophie had a beautiful, full, and colorful fleece.
Sophie loved to cuddle, play, and enjoy the sunshine. One day, while wandering through the meadow, she realized she missed having friends. She had lots of leftover yarn scattered everywhere. She decided to use this leftover yarn to crochet more friends, so she wouldn't be alone anymore.
Sophie and her friends are now not only a lovely decoration for Sophie’s meadow but also cuddle buddies for herself and others. Thanks to Sophie’s creativity and love for crocheting, she became the symbol of friendship and coziness in the village, bringing a smile to everyone's face.
Because Sophie doesn’t like to be alone, she has made the crochet pattern available for free so you can also crochet many sheep friends with your leftover yarn.
See here online the crochet pattern for Sophie - The Woolly / Chubby Sheep. If you prefer to receive the pattern in a digital PDF form or as a printed A5 booklet, click here.
Happy Crocheting with the Sheep Sarah, Sophie & Sandy! 🗒️🐑🧶🐑🧶

What do you need to crochet Sophie - The Woolly Sheep?
| Yarn: | Several colours of Cosy Fine yarn or other yarn suitable for crochet hook size 4.0/4.5. |
| Crochet Hook: | 4.0 |
| Safety Eyes: | 2 x 6 mm |
| Embroider Yarn: | Black for the Mouth and the Nose. |
| Miscellaneous | Fiberfill, Scissor, Nylon Yarn for attaching the little balls, Stitch Markers and a Tapestry Needle |

Abbreviations
| MR | Magic Ring |
| Ch | Chain |
| Sl. St. | Slip Stitch |
| Sc | Single Crochet |
| Inc | 2 Single Crochet in the same stitch |
| Dec | Crocheting 2 Single Crochet invisible together |
| LS | Loop Stitch |

Helpful Tutorials / Guides for Crocheting Sophie - The Sheep
- When tighten the Magic Ring: When do you tighten the Magic Ring securely?
- Stuffing Amigurumi: When and How to stuff your Amigurumi part?
- Invisible Closing Amigurumi: How do I close an Amigurumi part perfectly?
Or check out the helpful Tips & Tricks from Pixel 2 Mix -Homemade Crafts- to optimize, enhance, and perfect your crochet work!
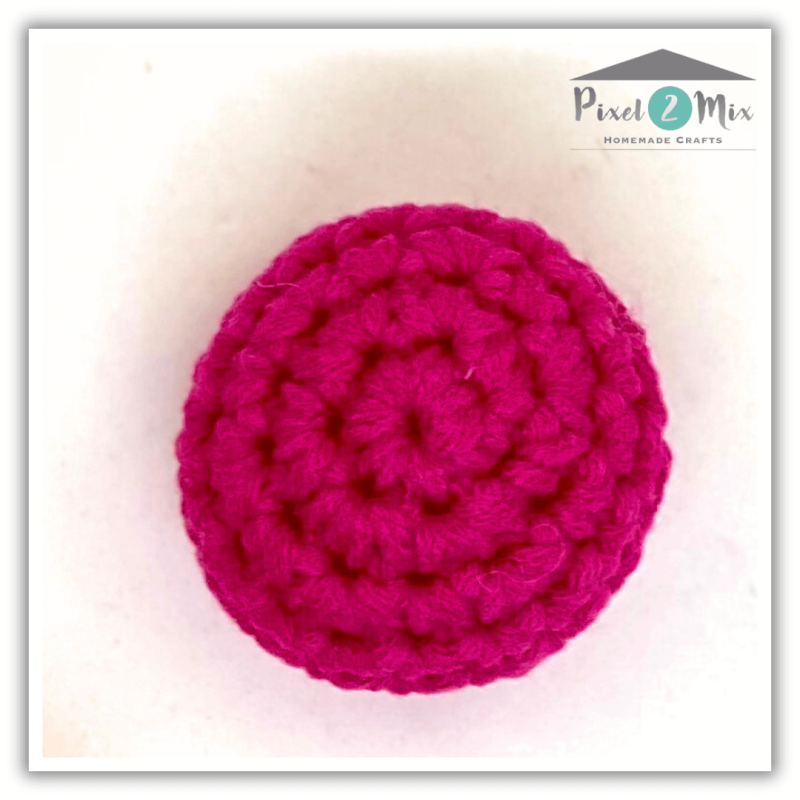
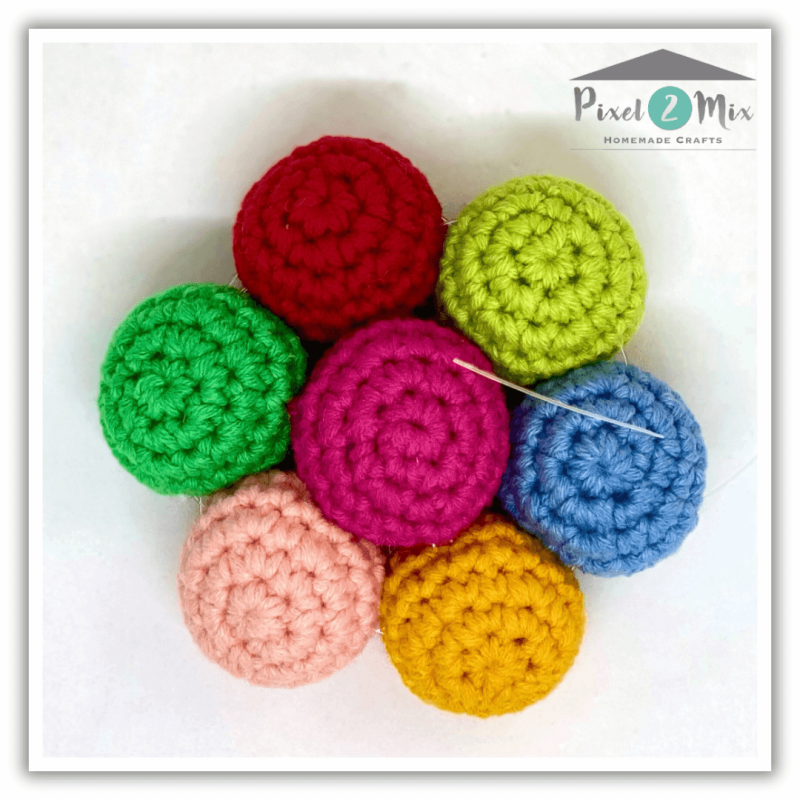
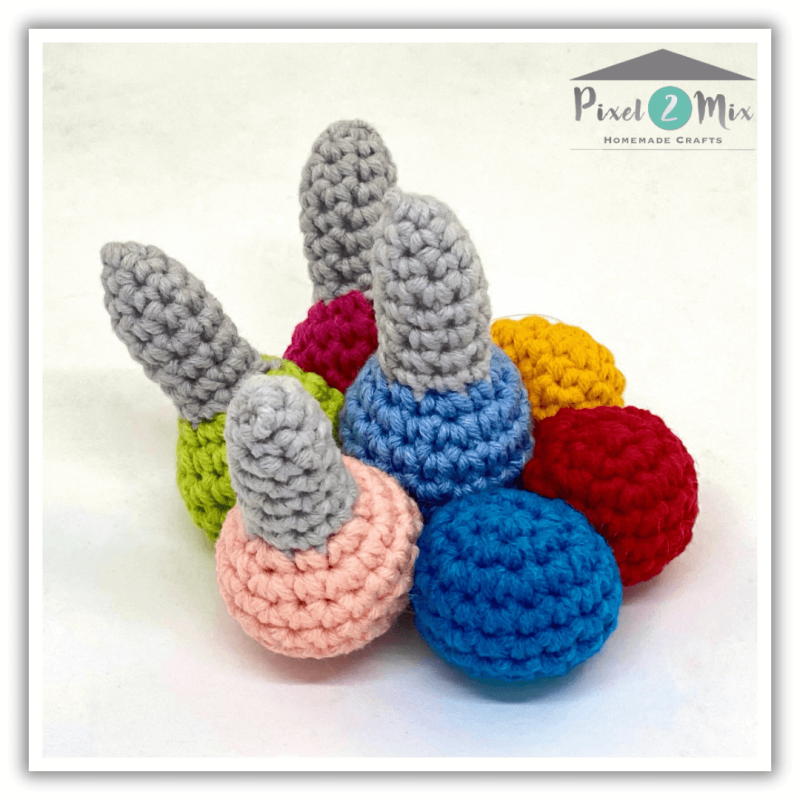
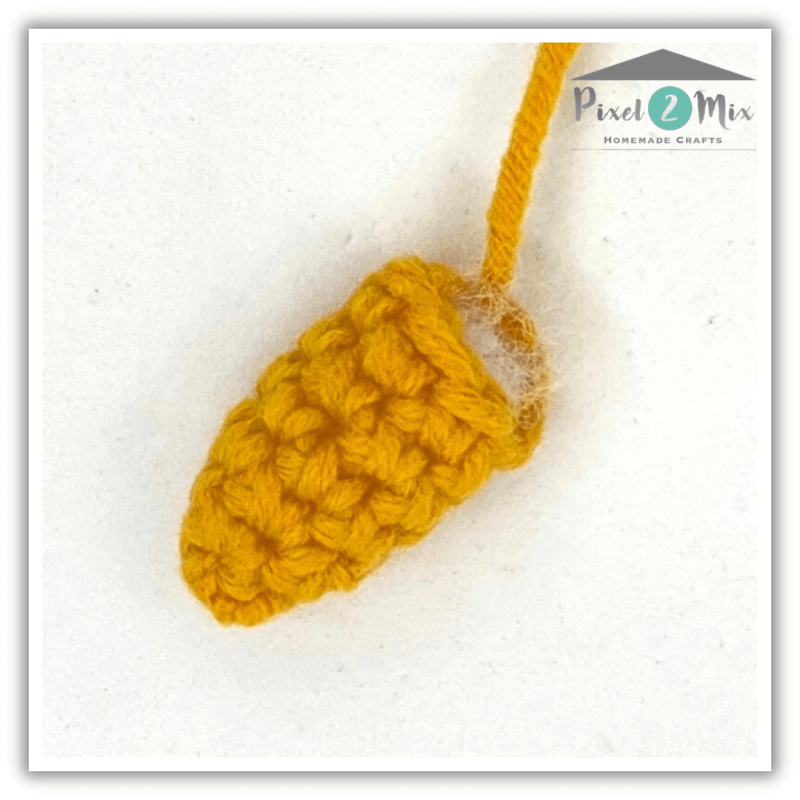
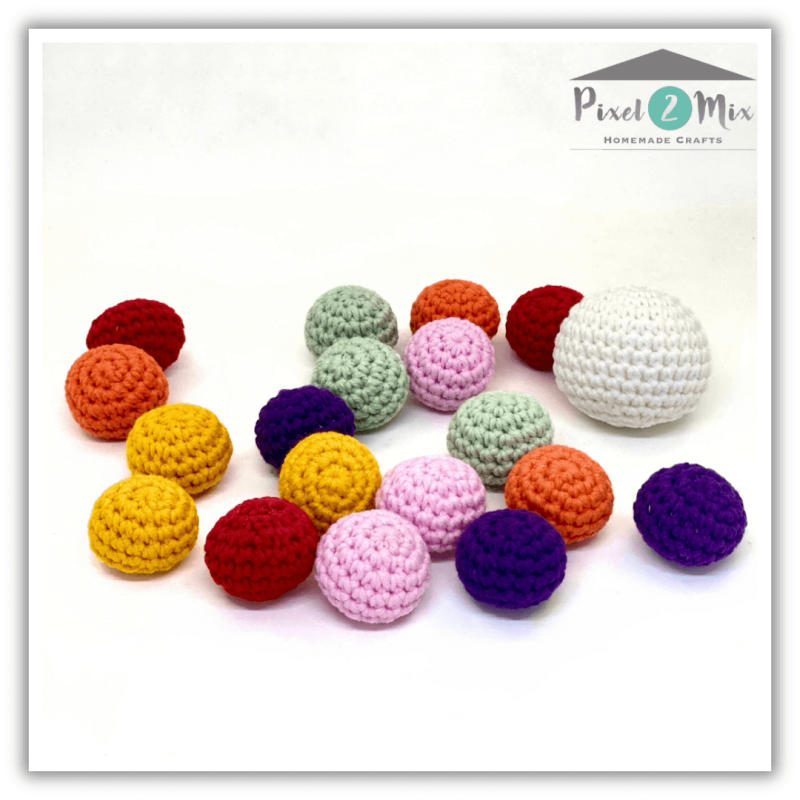
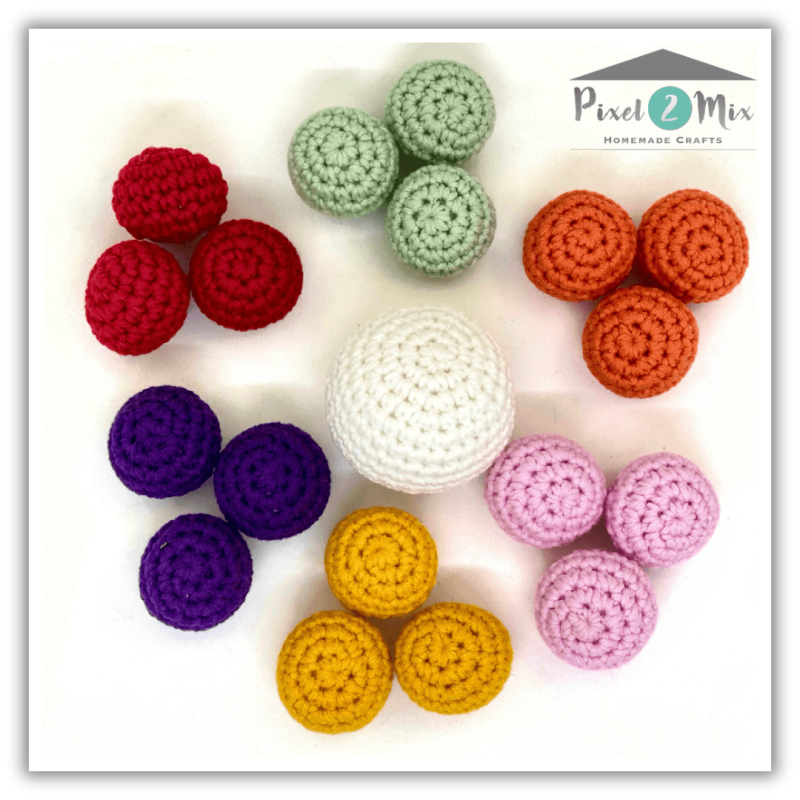
Small Ball (18 Pieces)
Color(s): Which you want
Helpful Links to Start a Ball with a Magic Ring, Stuff and Close Invisibly: Click here
| * | Start with a Magic Ring | |
| Row 1. | In the Magic Ring: 6Sc | 6 |
| Row 2. | Inc x 6 | 12 |
| Row 3. | (Sc, Inc)) x 6 | 18 |
| Row 4.-6. | Sc in Every Stitch (3 Rows) | 18 |
| Row 7. | (Sc, Dec) x 6 | 12 |
| - | Start filling the ball | |
| Row 8. | Dec x 6 | 6 |
| - | Stuff the ball up even further | |
| - | Close the gap invisibly and after that cut the yarn, see tutorial |
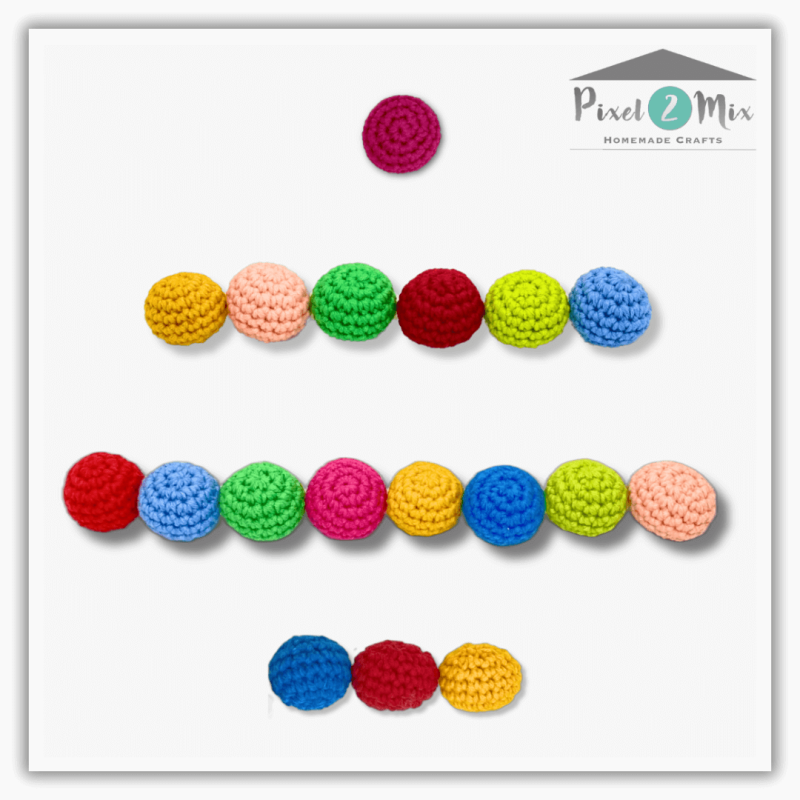
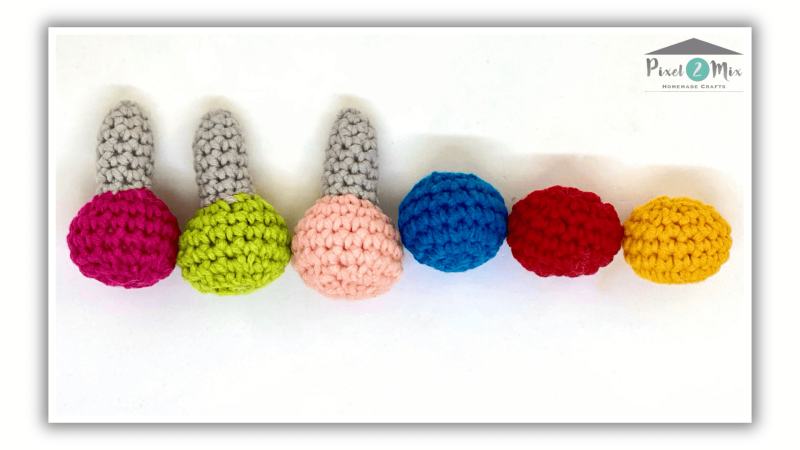
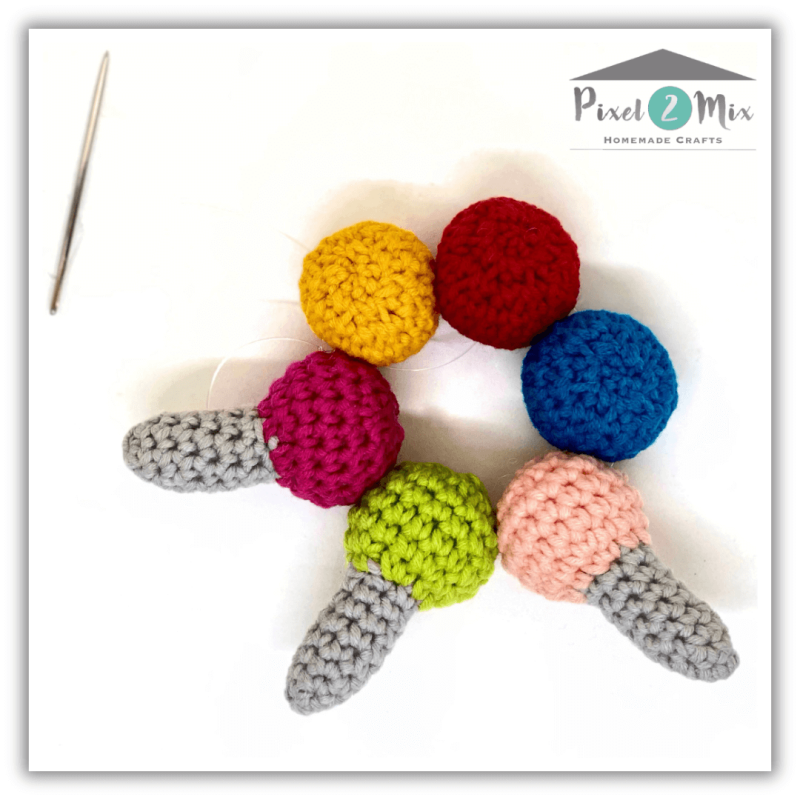
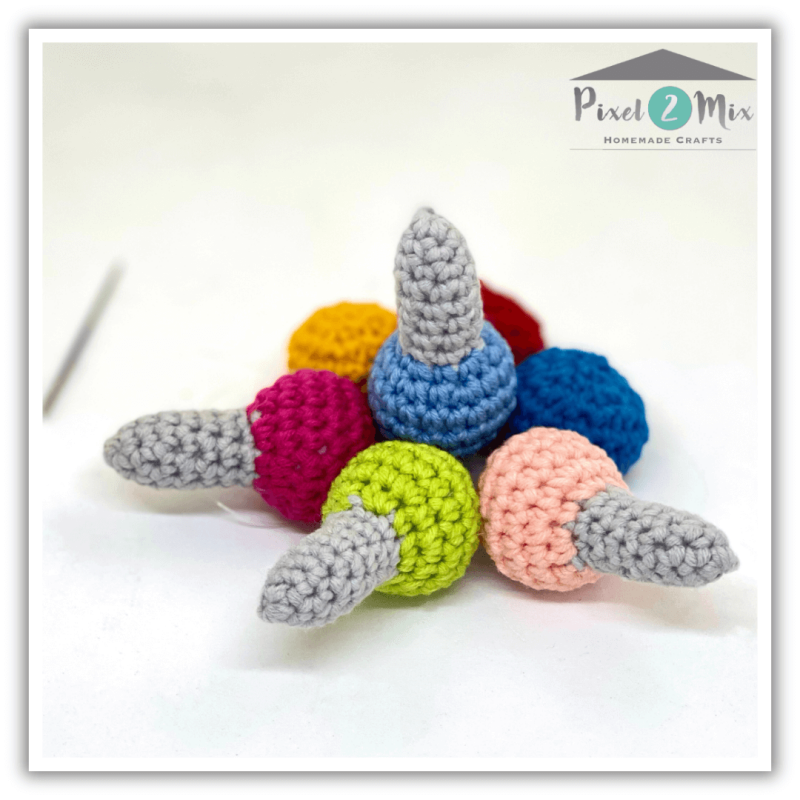
Ball with Leg (4 Pieces)
Color(s): Whichever you want -> Tip: Do crochet all the 4 legs in the same color
| * | Start with a Magic Ring | |
| Row 1. | In the Magic Ring: 4Sc | 4 |
| Row 2. | (Inc, Sc) x 2 | 6 |
| Row 3. | (Sc, Inc, Sc) x 2 | 8 |
| Row 4.-8. | Sc in Every Stitch (5 Rows) | 8 |
| - | Fill the leg firmly with fiberfill |
Change to the Color you want, but into a different Color than the leg!
| * | Start with a Magic Ring | |
| Row 9. | (Inc, Sc) x 4 | 12 |
| Row 10. | (Sc, Inc) x 6 | 18 |
| Row 11.-13. | Sc in Every Stitch (3 Rows) | 18 |
| Row 14. | (Sc, Dec) x 6 | 12 |
| - | Continue filling | |
| Row 15. | Dec x 6 | 6 |
| - | Stuff up even further | |
| - | Cut the yarn and close the gap invisibly, see tutorial |

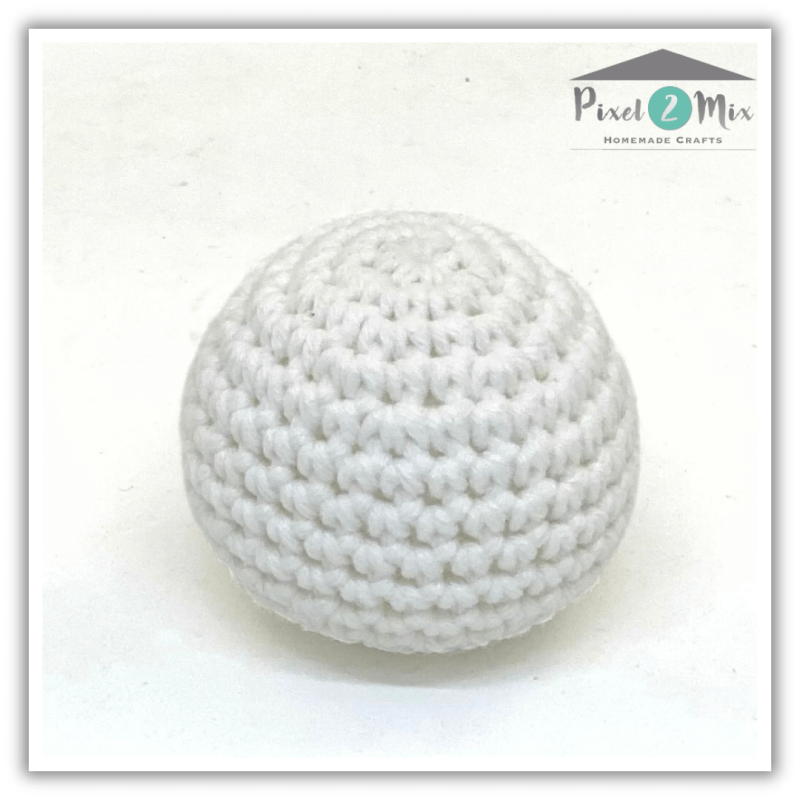
Inner Ball
Choose the Color you want or still have. It is almost invisible, but will serve as a nice base for the body of the sheep
| * | Start with a Magic Ring | |
| Row 1. | In the Magic Ring: 6Sc | 6 |
| Row 2. | Inc x 6 | 12 |
| Row 3. | (Sc, Inc) x 6 | 18 |
| Row 4. | (Sc, Inc, Sc) x 6 | 24 |
| Row 5. | (3Sc, Inc) x 6 | 30 |
| Row 6.-10. | Sc in Every Stitch (5 Rows) | 30 |
| Row 11. | (3Sc, Dec) x 6 | 24 |
| - | Start filling | |
| Row 12. | (Sc, Dec, Sc) x 6 | 18 |
| Row 13. | (Sc, Dec) x 6 | 12 |
| Row 14. | Dec x 6 | 6 |
| - | Fill the ball completely and firmly, then close the opening invisibly. | |
| - | Cut the yarn and weave in the ends |
Inner Ball – Side View
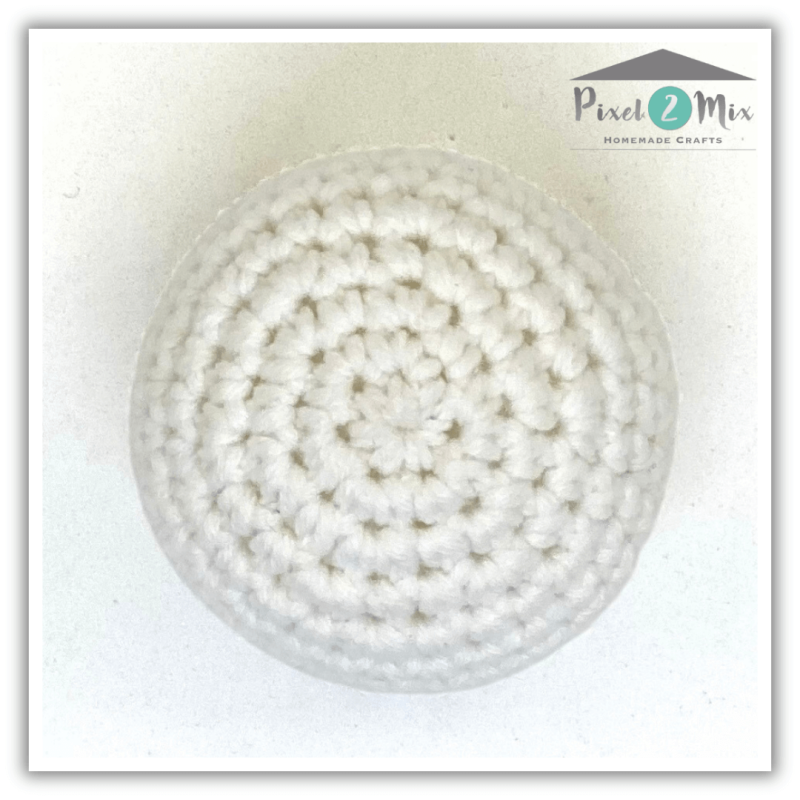
Inner Ball – Top View

Inner Ball – Bottom View
| * | Start with a Magic Ring | |
| Row 1. | In the Magic Ring: 6LS | 6 |
| Row 2. | (2LS in Every Stitch) x 6 | 12 |
| Row 3. | (LS, 2LS in the Next Stitch) x 6 | 18 |
| - | Cut the yarn | |
| - | At this very moment you see that the loops are on the inside of your work. Turn your work inside out so the loops are now on the outside | |
| - | Move the yarn from the Magic Ring to the inside of your work where the loops are not. |
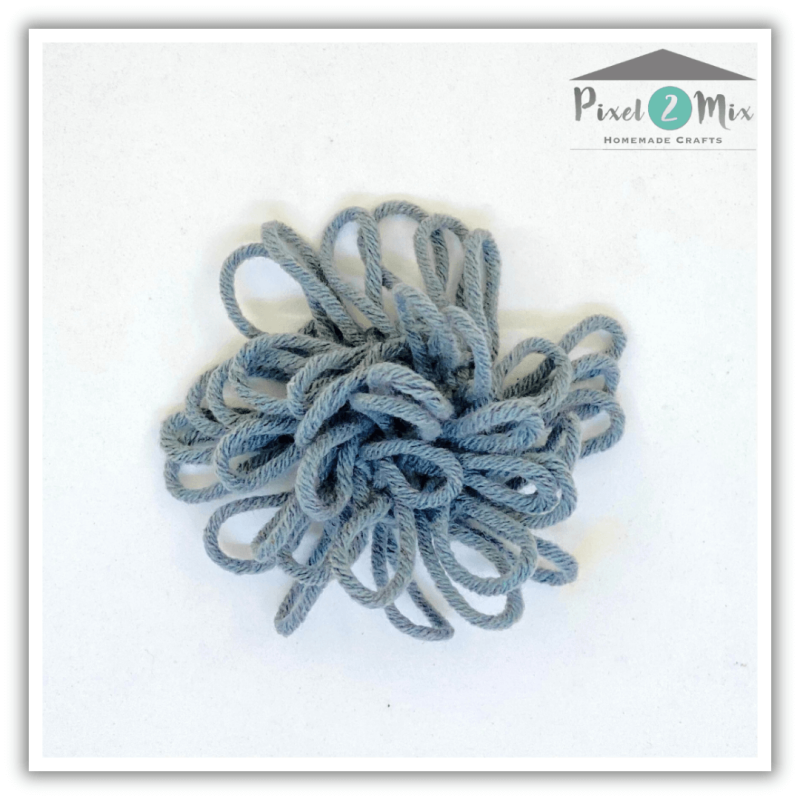
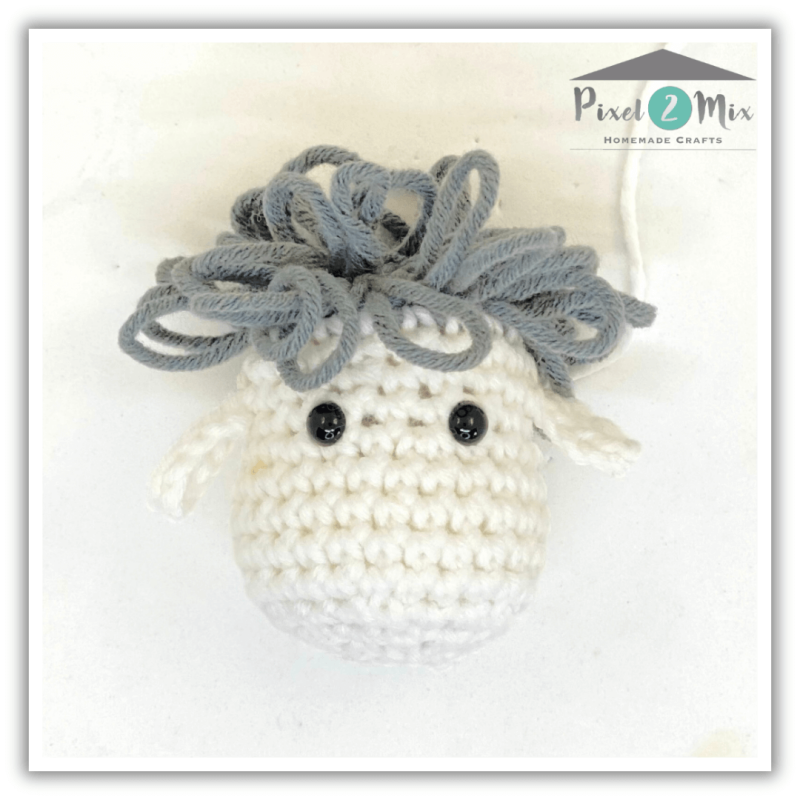
Hair Row 1.-3.

Start – Beginning of the Face

First 3 Stitches of Row4.
Color: White
| - | Attach a new piece of yarn | |
| Row 4. | Sc in Every Stitch | 18 |
| Row 5. | 5Sc, 12Ch, 9Sc, 12Ch, 4Sc | 18+24Ch |
| Row 6. | Do not crochet in the Chains, these are the ears. Be aware of it that the Chains are on the outside of your Head. Crochet Sc in Every Stitch | 18 |
| Row 7. | Sc in Every Stitch | 18 |
| Row 8. | (Sc, Inc, Sc) x 6 | 24 |
| Row 9.-12. | Sc in Every Stitch (5 Rows) | 24 |
| (Crochet optionally 1 round less if you want the face to be slightly shorter.) | ||
| - | If you are using safety eyes, attach them now between Row 7. and Row 8. with 3 Stitches in between, and between the ears. |

| Row 13. | (Sc, Dec, Sc) x 6 | 18 |
| Row 14. | (Dec, Sc) x 6 | 12 |
| - | Fill the Head firmly with fiberfill | |
| Row 15. | Dec x 6 | 6 |
| - | Close the gap invisibly and cut a longer piece of yarn, use it to attach the head to the body. | |
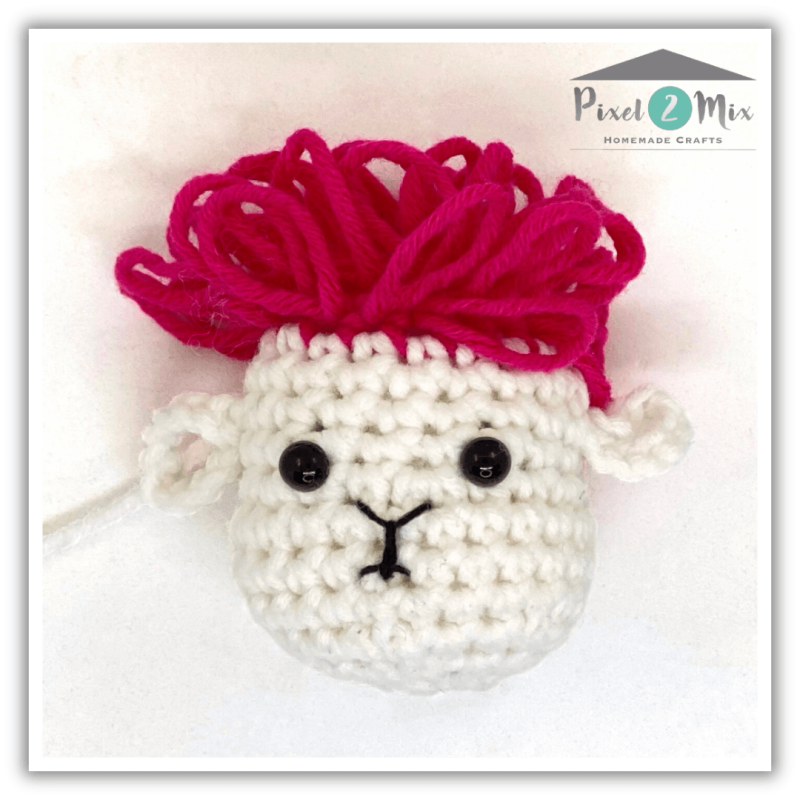
| - | Embroider the nose and mouth on the head (See Photos). |
Head Finished, Including Row 12.

Bottom of the head, close it in the same way as with the balls, see Tutorial
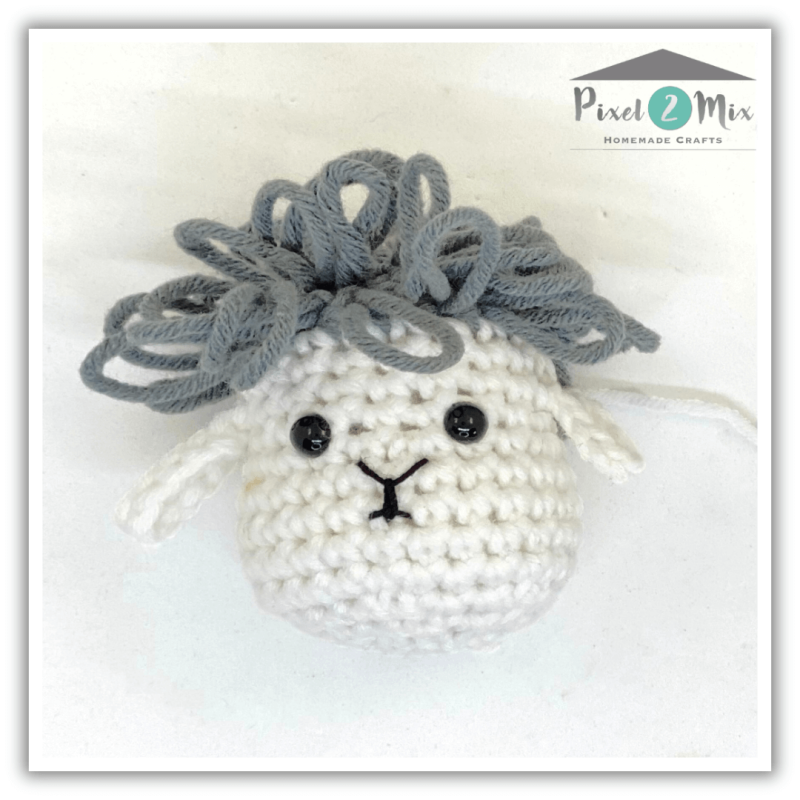
Embroider the nose and the mouth on the head.
Tail
Color: Which color you want
| * | Start with a Magic Ring | |
| Row 1. | In the Magic Ring: 4Sc | 4 |
| Row 2. | (Inc, Sc) x 2 | 6 |
| Row 3. | (Sc, Inc, Sc) x 2 | 8 |
| Row 4.-6. | Sc in Every Stitch (3 Rows) | 8 |
| - | Lightly stuff the tail with filling. | |
| - | Cut a longer piece of yarn, use this later on to attach the tail to the body |

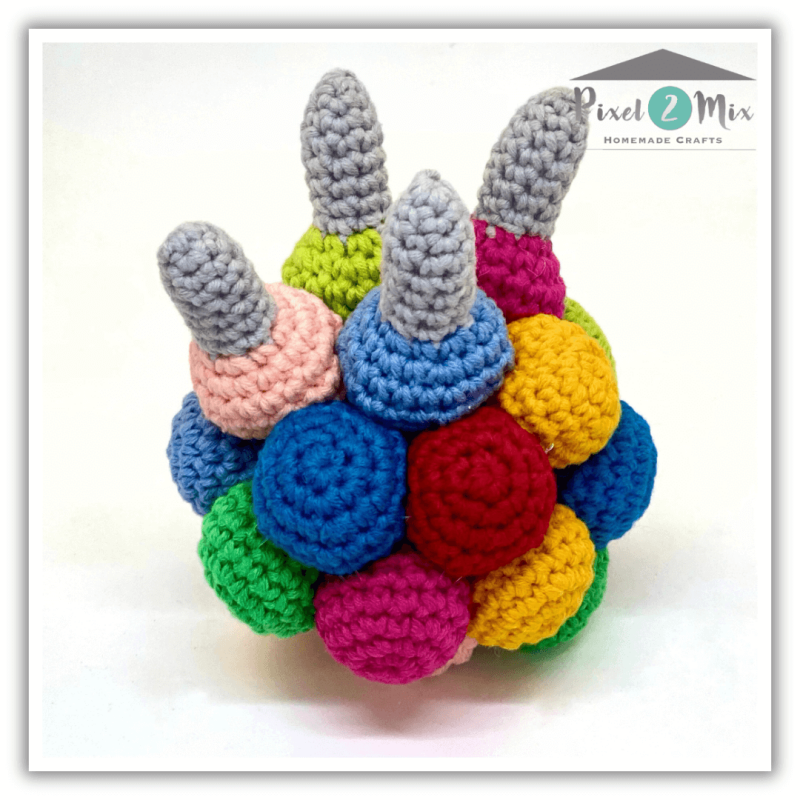
Assembling Sophie - The Little Sheep
| - | There are more ways to assemble Sophie - The Chubby / Woolly Sheep |
| Method 1. | First attach the individual layers, then assemble them together. |
| Method 2. | Pin the balls onto the inner ball and attach them together. |
| Method 3. | Glue all the balls onto a foam ball, and optionally glue the head and tail as well (not explained here). |
| TIP | Use transparent nylon yarn to attach the balls and the balls with the legs to the body! |
Method 1.
| Step 1. | (= Circle 1) |
| - | Put 8 balls on a nylon yarn between Row 4. and 5. of each ball with 9 stitches in between. Make it a circle by putting the yarn again in the same stitches for the 2nd time, for strength. Pull the wire tight so you can't see it anymore. |


| Step 2. | (= Circle 2) |
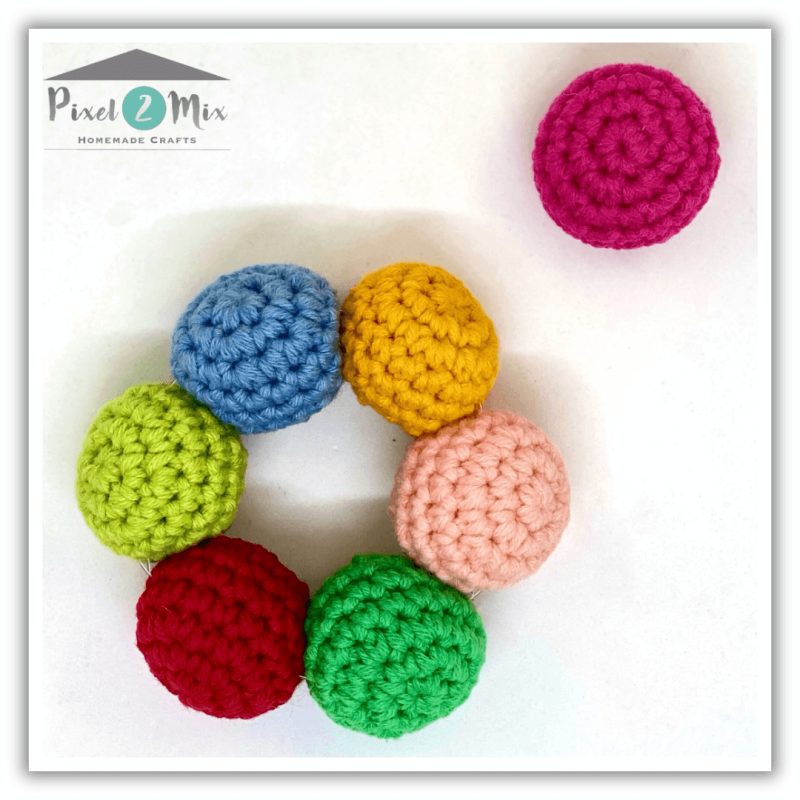
| - | Put 6 balls on a nylon yarn between Row 4. and 5. of each ball with 9 stitches in between. Make it a circle by putting the yarn again in the same stitches for the 2nd time, for strength. Pull the wire tight so you can't see it anymore. |


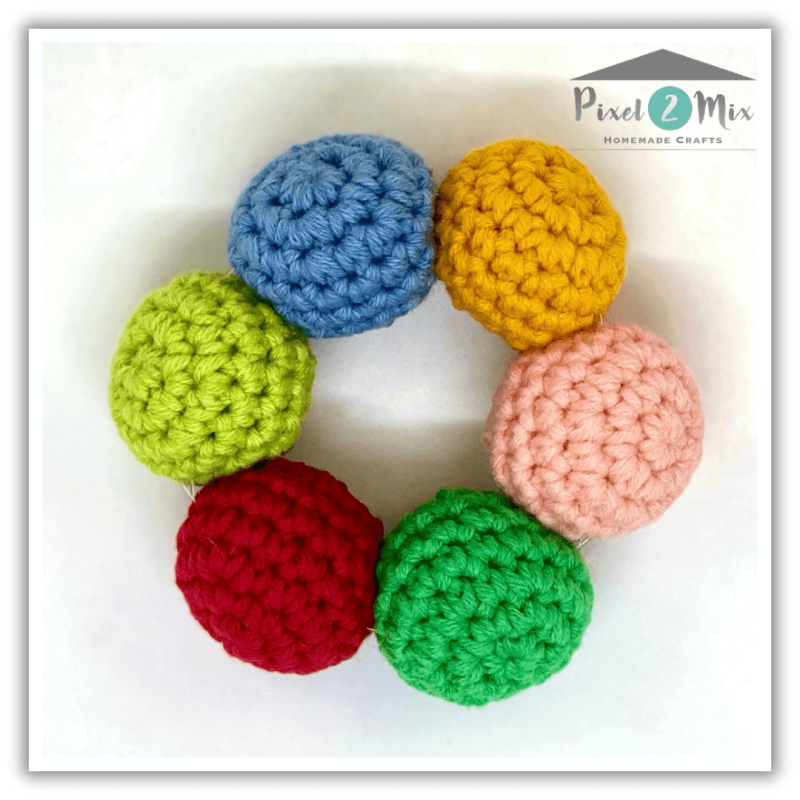
| Step 3. | Put 1 ball in the gap of Step 2 and you attach this ball to Circle 2 (= The Circle with 6 balls) |

| Step 4. | (See Photos) |
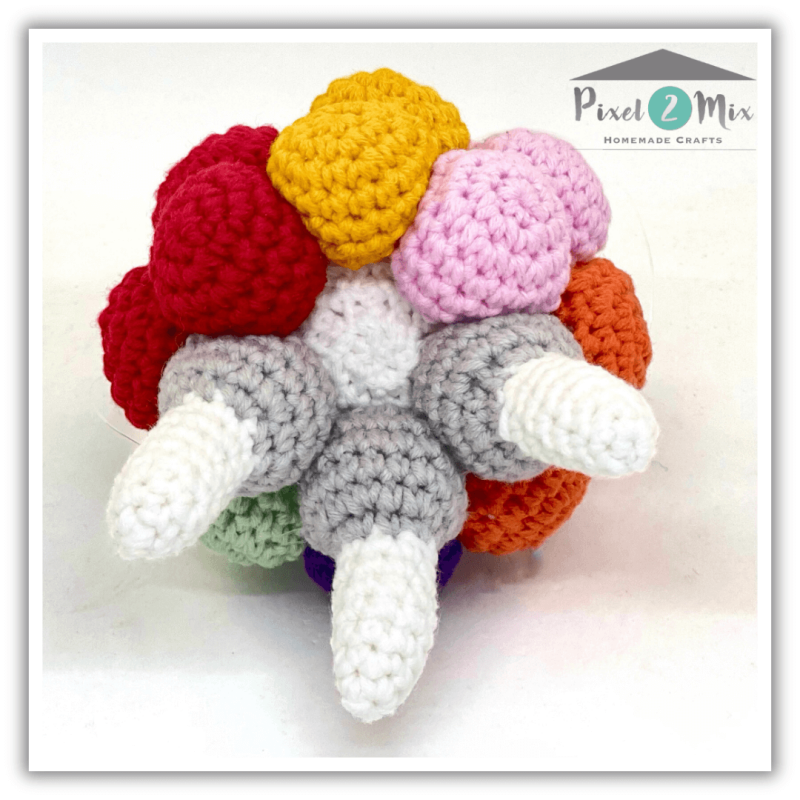
| 4A. | Take the Inner Ball and put Circle 1 with 8 balls around it |
| 4B. | On top of that, place Circle 2 with 6 balls + 1 and attach them with the nylon yarn to each other |
| 4C. | Attach Step 2 and 3 to Step 1 and insert the Inner Ball |


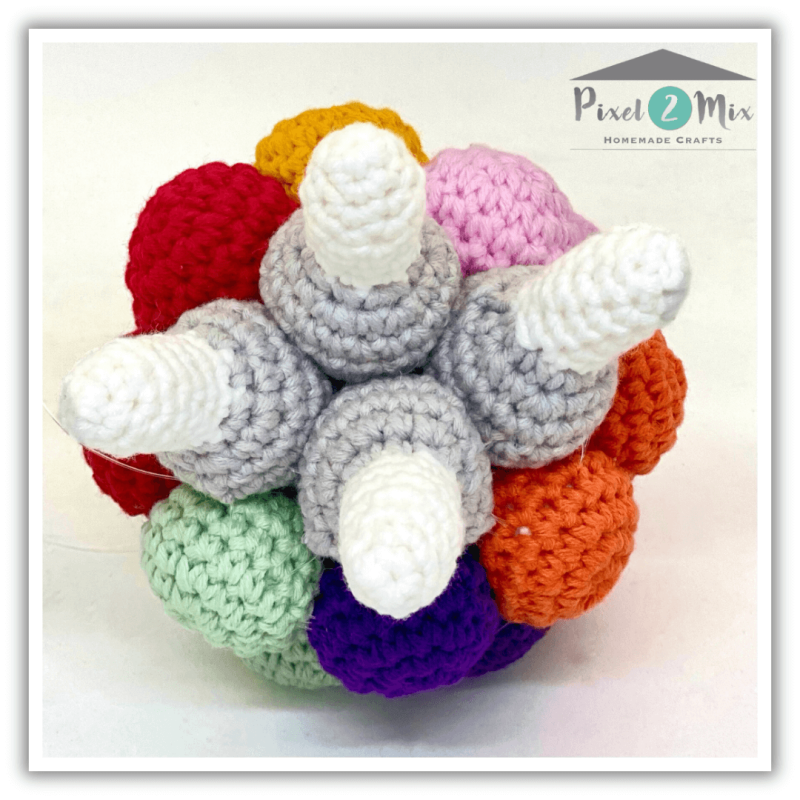
| Step 5. | (= Circle 3) |
| - | Put 3 balls with legs and 3 'normal' balls on a wire between Row 4. and 5. of each ball from the top with 9 stitches in between. Make it circle by inserting it for a 2nd time in the same stitches, for strength. Pull the wire tight so you can't see it anymore |
| Step 6. | Put 1 ball with leg in the gap of Step 5 and you attach this Ball with leg to Circle 3 (= The Circle with 3 balls with legs + 3 balls) |
| Step 7. | Attach the Circle with the legs (= Circle 3) to the Circle with the 8 balls |


| Step 8. | Attach the Head to the Body with the remaining yarn of the Head |


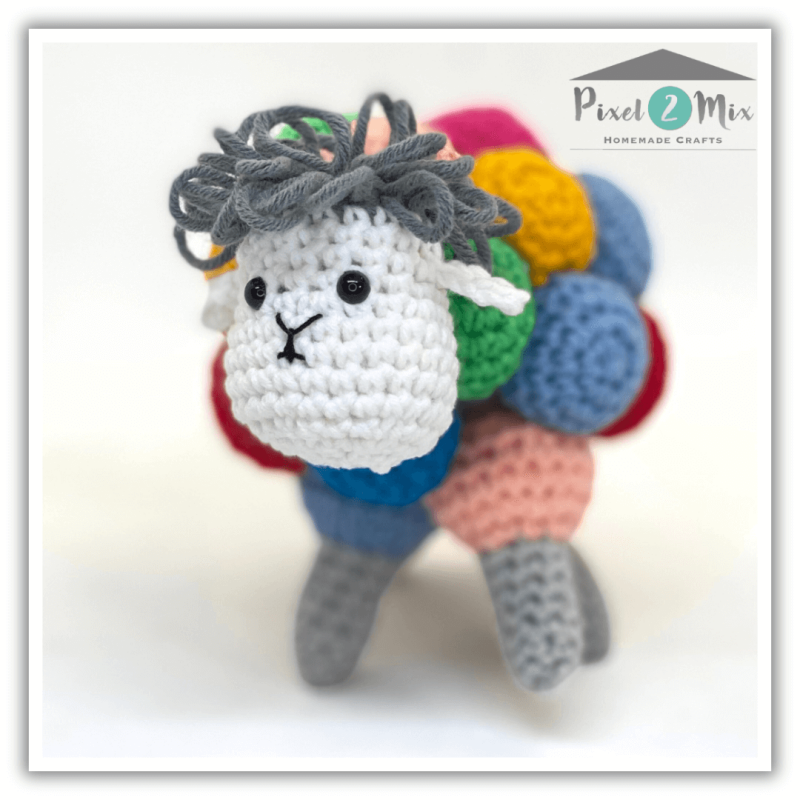
| Step 9. | Attach the Tail to the Body with the remaining yarn of the Tail |


Method 2.
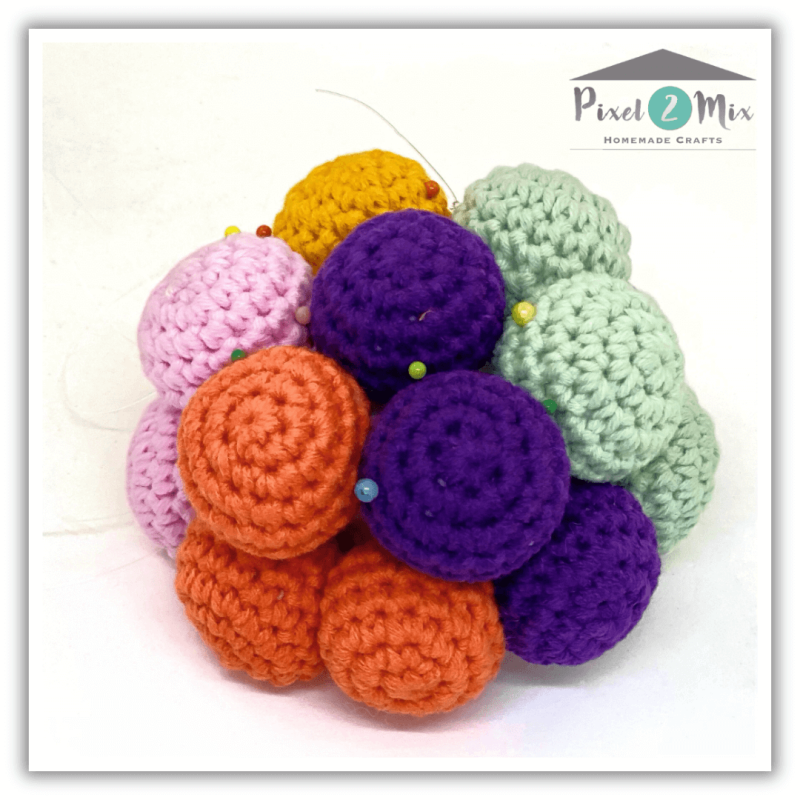
| TIP | Take a look at the Photo Tutorial below ⬇️ |
| Step 1. | Pin with pins 8 balls around the circumference of the Inner Ball and sew the balls together with nylon yarn |
| Step 2. | Pin 6 balls on the Inner Ball with pins and sew these balls on as well to each other with nylon yarn |
| Step 3. | Attach 1 ball to the gap of the 6 balls |
| Step 4. | Using the nylon yarn, attach the Circle with the 8 balls and the Circle with the 6 balls together |
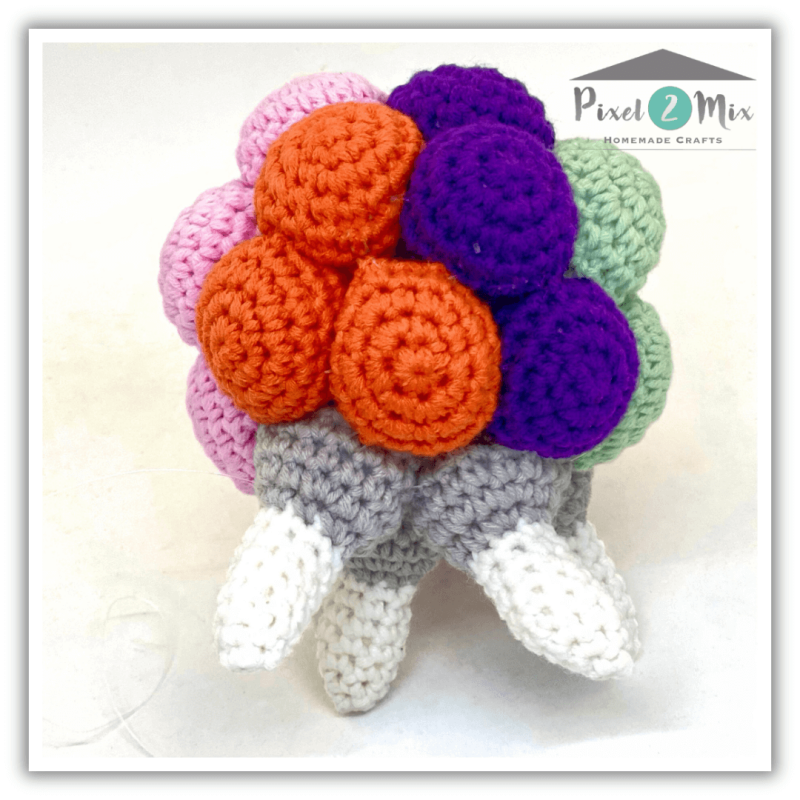
| Step 5. | Pin with pins 3 balls and 3 balls with legs and put together with nylon yarn. |
| Step 6. | Attach one ball with leg in the opening and secure with nylon yarn |
| Step 7. | Use the nylon yarn to make the Circle with the 8 balls attached to the 3 balls and the 3 balls with the legs together |
| Step 8. | Attach the Head to the Body with the remaining yarn |
| Step 9. | Attach the Tail to the Body with the remaining yarn |


Digital PDF Crochet Pattern - Sophie - The Chubby & Woolly Little Sheep
Prefer a PDF Digital Crochet Pattern for Sophie - the Chubby, Woolly Sheep, which you can easily save, print, and keep on your lap? That’s definitely possible! Click Here
Order your free Amigurumi crochet pattern and receive the PDF pattern in your mailbox. Leave your details, and within a short time, you can start this adorable project. Sophie - The Chubby Woolly Sheep, is waiting to be brought to life by you!
With the free Amigurumi crochet pattern PDF, you can easily save, print, and always have the pattern handy while crocheting. Crochet Sophie - The Chubby Woolly Sheep - and add a unique and cute Amigurumi figure to your collection while using up your leftover yarn.
Would you prefer a printed A5 booklet containing the pattern for Sophie - The Chubby Woolly Sheep? Pixel 2 Mix - Homemade Crafts - can provide that for you as well. Please note that there will be a cost associated with the printed booklet. Click Here
Happy Crocheting!

Go Directly to the Online Crochet Pattern for
Sophie - The Chubby Woolly Sheep
Click Here


Add comment
Comments